

Preparing mruby Development Environment for windows
You need the following 3 to build mruby:
- Development Environment for C (Eg: gcc)
- Ruby (CRuby)
- Git (Repository management system)
If you don’t have any editing software, you may use Visual Studio Code (Microsoft)
1. Installing MinGW (Development Environment for C)
You can find MinGW installer MINGW-w64-for 32 and 64bit Windows on this site. (May 2022) https://sourceforge.net/projects/mingw/
Save the installer from the download button.
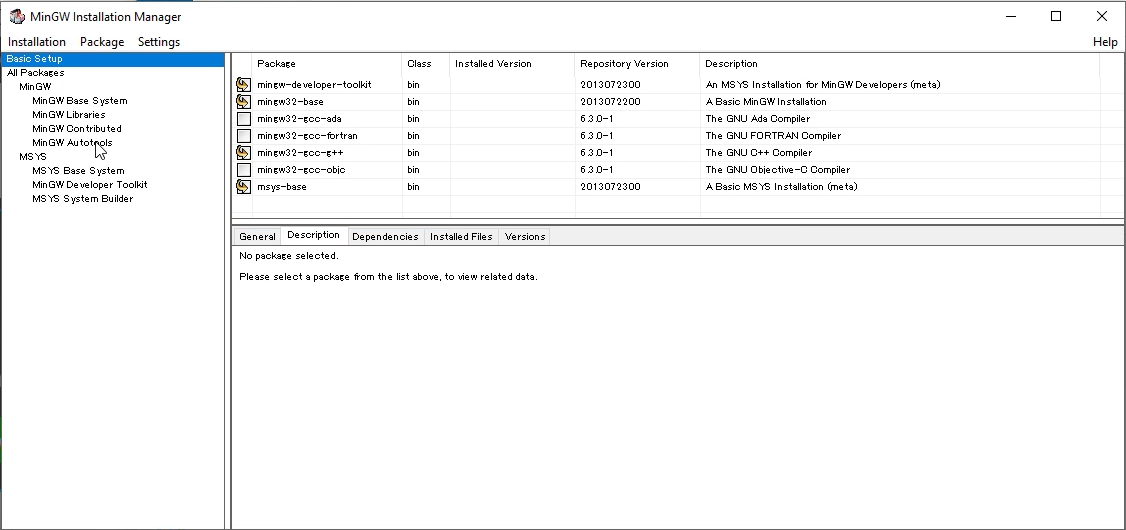
After the installation starts, check the items that need to be installed in the Installation Manager. Refer to the figure below.
When the installation finished successfully then you need to set the path for MinGW.
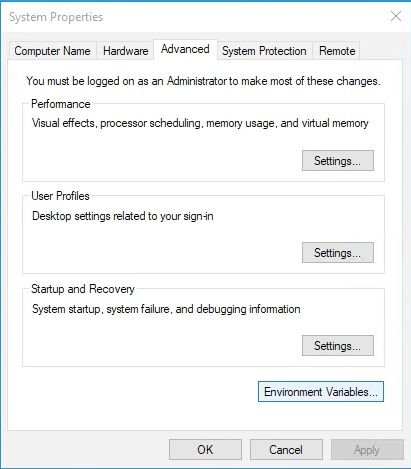
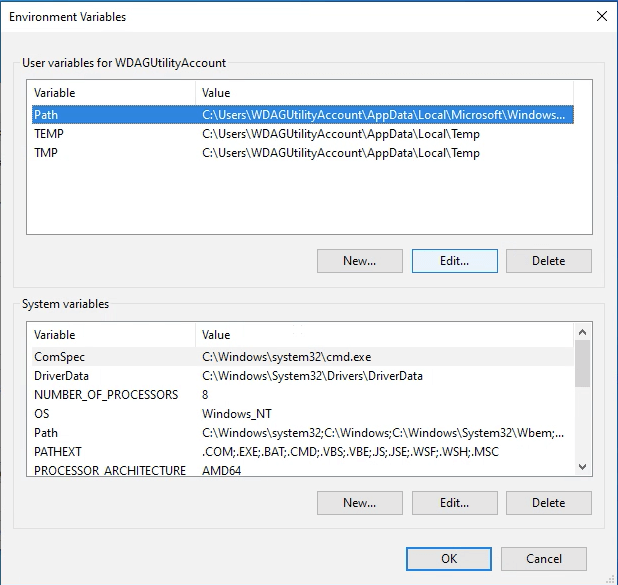
From system properties->choose Environment variables
Edit Path and add MinGW installed folder (Eg:c: MMingW)
2. Installing Ruby
See the Installation page for details on using package management systems or third-party tools.
Ryby installer https://rubyinstaller.org/
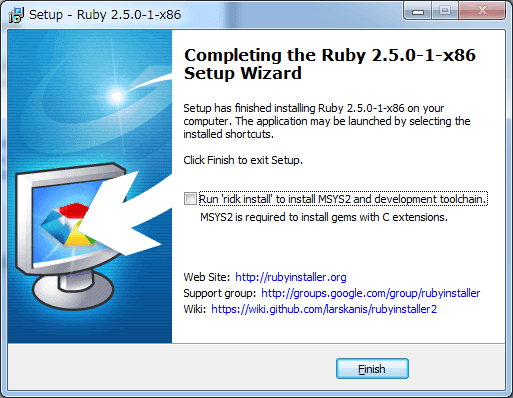
Make sure to uncheck Run ridk install’ to install MSYS2 and development toolchain on Completing the Ruby xxxx Setup Wizard
3. Installing Git
You can find git installer here.
https://gitforwindows.org/
Confirming the environment
Start msys.bat and type the following from the terminal to see the version information for each.
1
2
3
4
$ gcc —version
$ ruby —version
$ bison —version
$ git —version
Preparing mruby Development Environment for Mac OS
You need the following 3 to build mruby:
- Development Environment for C (Eg: gcc)
- Ruby (CRuby)
- Git (Repository management system)
If you don’t have any editing software, you may use Visual Studio Code (MacOS)
1. Installing Development Environment for C
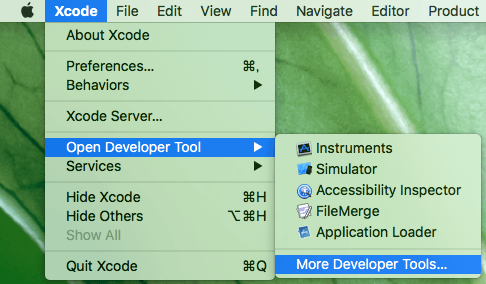
To install Xcode Command Line Tools, launch Xcode and click Xcode - Open Developer Tool - More Developer Tools… from menu.
Then download the installer (dmg) of Command Line Tools and install it.
2. Installing Ruby
Ruby is already installed on your Mac.
You can download and use a different version of Ruby.
3. Installing Git
If you install Xcode or Xcode Command Line Tools, Git is included.
Or you can get it from the Mac App Store.
Confirming the environment
Start msys.bat and type the following from the terminal to see the version information for each.
1
2
3
4
$ gcc —version
$ ruby —version
$ bison —version
$ git —version
How to get mruby and build mruby
you can download mruby from github
$ git clone https://github.com/mruby/mruby.git
Then build mruby
$ cd mruby
$ rake
After building mruby, you need to set the path for mruby.
For Windows users
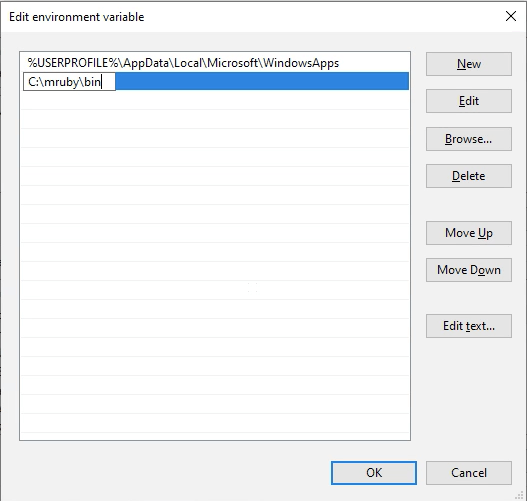
From system properties -> choose Environment variables
Edit Path and add mruby installed folder’s bin (Eg: c:\mruby\bin)
For Mac users
export your mruby/bin folder
Small mruby tutorial
This is a small mruby tutorial.
It makes the assumption that you already have mruby installed.
mruby Directory structure
This is the directory structure you will find on your PC/Mac after the installation.
mruby directories:
-
benchmark/
-
bin/ mruby binary
-
build/
-
host/ Buid result for PC
-
-
build_config/ Build Script
-
doc/
-
examples/
-
include/ mruby header file
-
lib/
-
mrbgems/ stored mrbgems directory
-
mrblib/ mruby library source file (Ruby libray)
-
ross-fizz/
-
src/ mruby source file
-
tasks/
-
test/
And in the bin directory, you will find
mruby interpreter
mruby (mruby interpreter) has some switches.
Usage: mruby [switches] [programfile] [arguments]
Switches:
You can excute Ruby script. For example:
hello.rb
    p ‘Hello.mruby.’
Just type
1
2
> mruby hello.rb (Windows user)
% ./mruby hello.rb (Mac user)
Interactive mruby (mirb)
mruby comes with a program that will show the results of any mruby statements you feed it. Playing with Ruby code in interactive sessions like this is a terrific way to learn the language.
Usage: mirb [switches] [programfile] [arguments]
Switches:
Open up mirb (which stands for Interactive mruby).
- If you’re using macOS open up Terminal and type mirb, then hit enter.
- If you’re using Windows, open up Command Prompt and type mirb, then hit enter.
- If you’re using Linux, open up a shell and type mirb and hit enter.
1
2
3
4
5
6
7
8
% mirb
mirb - Embeddable Interactive Ruby Shell
> 0xffff
 => 65535
> a=[1,4,7]
 => [1, 4, 7]
> a*3
 => [1, 4, 7, 1, 4, 7, 1, 4, 7]